Showing posts with label cooking. Show all posts

Sunday, December 1, 2019

Hardtack, The 18th and 19th Century Survival Ration ©


An example of hardtack made by the author, picture by the author


Everyone has heard of hardtack, or hard bread, plain biscuit, ship’s biscuit, sea biscuit, sheet-iron crackers or tooth-dullers.  Since it is close to the American Thanksgiving holiday, I thought that I would do an article on food; I hope that you enjoy it and have fun making your own plate of hardtack.

During the 18th and 19th centuries hardtack wasn’t a survival ration and in fact, was part of the regular ration when soft bread wasn’t available, such as when you were aboard a ship or marching.  Today, hardtack can be used as a survival ration. 


Excerpts from Hardtack and Coffee, by J. D. Billings, page 113 and 114


So just what is hardtack?  How nutritious is it and how do you make it? 

Hardtack is simply a water and flour paste that is baked into a biscuit and dried until it has the consistency of a ceramic tile.  Some recipes from the internet, call for the addition of salt or even sugar to the flour and water, but as Jeff Pavlik writes on page 8 of “Reproducing The Eighteenth-Century Biscuit”, “Biscuit makers of the period were well informed of the detrimental effects of salt in a biscuit and were advised to ‘not use salt…salt can make it more likely to attract moisture from the air’.  Along with no mention of salt in any documents on biscuits…” and “Sea-bisket-of excellent use for the Sea, because baked without Salt…”.   Additionally, numerous writers have written that the addition of sugar to the recipe, while it makes it more palatable, will likely reduce your ability to store the biscuits for long periods of time.  So, don’t use salt or sugar when making your biscuits, if you want a ration with a long shelf life.

So, what was a day’s ration of hardtack and just how nutritious is it?  According to John D. Billings, writing on page 112 of Hardtack And Coffee, an American Civil War Union Soldier, as part of their daily ration, was supposed to receive “…one pound six ounces of soft bread or one pound of hard bread”.  When the soldiers were on the march, they only received the hard tack.  Billings also wrote that while the hardtack was shipped to the Union Army by weight, it was passed out to the men by number, with some regiments passing out nine biscuits as a ration and in others a ration of hardtack was ten biscuits.

An excerpt from Hardtack and Coffee, by J. D. Billings, page 113
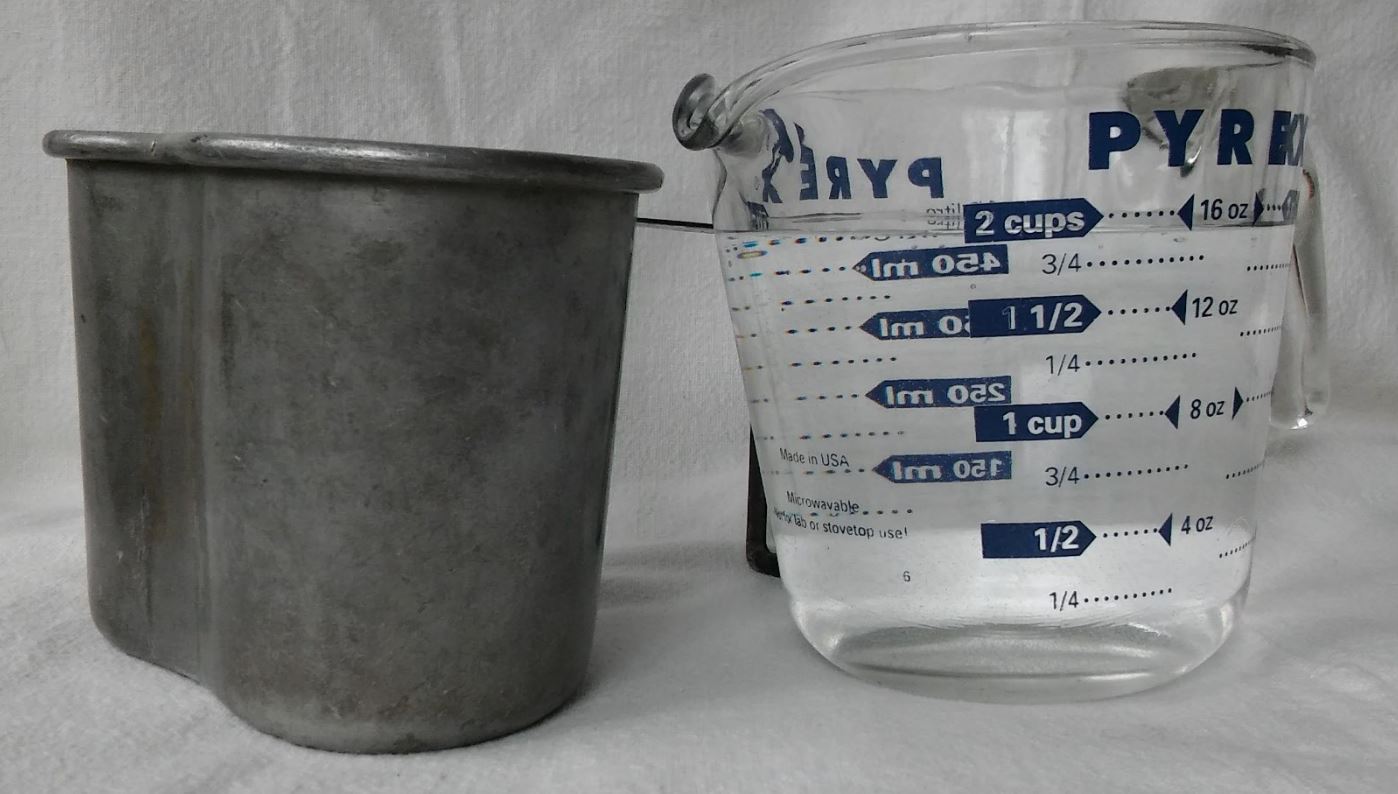
  
The recipe that I am using, calls for three American measuring cups of whole-wheat stone-ground flour.  I am using Hodgson Mills stone-ground, whole-wheat flour, but you can use whatever stone-ground, whole-wheat flour is available where you live.  Jeff Pavlik, the author of “Reproducing The Eighteenth-Century Biscuit”, states on page 7 that these three cups of flour will weigh a pound.  Additionally on page 9, he states that “The recipe I have created will make 1 ½ pounds of unleavened dough…The water lost baking and drying the biscuits will reduce the weight by 1/3”, which will leave you with one pound of finished biscuits.  When I was finished baking my biscuits; I had ten biscuits, each three inches (7.6 cm) wide by ½ inch (1.27 cm) thick, that did weigh altogether one pound.  However, this left me a little confused, because according to the Hodgson Mills label, each cup of flour is supposed to weigh four and a quarter ounces or 120 grams; and three cups would weigh 13 ounces or 360 grams: this is three ounces short of a pound?!  The answer turned out to be the difference between sifted versus scooped-out-of-the-bag flour: sifted flour is fluffed up and less fits into the measuring cup, while flour that you have scooped-out-of-the-bag is packed down and more is in the measuring cup.  Okay, mystery solved.
 
Hodgson Mills whole wheat flour nutrition information, picture by the author.
  
So, how nutritious is hardtack?  Well, if three packed cups of flour equal a pound, and a pound is equal to 453 grams, then the daily ration of hardtack would have the following nutrition facts printed on the side of the box.


Okay, so hardtack isn’t the most nutritious food choice out there and is lacking in most of the necessary vitamins and nutrients, but it isn’t the least nutritious food choice available to the modern American, either. 
 
An excerpt from “Reproducing The Eighteenth-Century Biscuit”, by Jeff Pavlick, page 11
   
Now to make some hardtack.  I used Jeff Pavlick’s recipe for hardtack in the preparation of this article, because Mr. Pavlick is both a baker and a historian: for more information about him and baking in the late 18th and early 19th centuries, go to http://colonialbaker.net/.  Use the recipe above, supplemented with my notes and pictures below to make your own hardtack.


The ingredients, picture by the author
  
The recipe calls for 3 cups (453 grams) of white whole-wheat flour and a cup, plus 2 tablespoons (.28 liters) of water.  The recipe says that if the dough is too stiff to mix by hand add an additional tablespoon (.015 liter) of water, when I made this recipe the last time, I found that I needed to add an extra 1 ½ tablespoons (.02 liters) of water to wet all of the flour. 
 
The resting dough, picture by the author
  
Combine the flour and dough and then let the stiff dough rest for ten minutes, so that the flour will completely soak up the water.
 
Kneading the dough, picture by the author
  
Knead the dough until it is smooth, this will take some time, but as the flour absorbs all the water it will become easier.
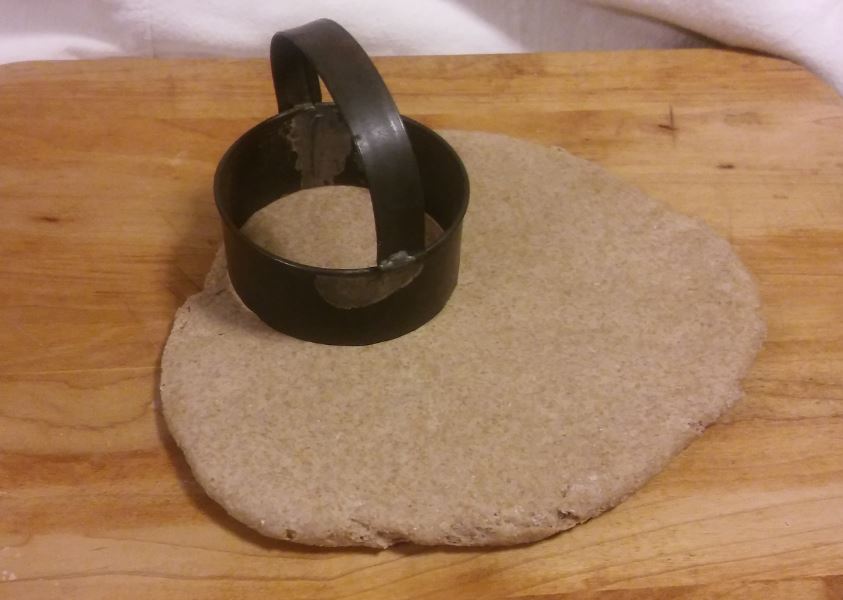
The author’s antique biscuit cutters.  The one in the foreground, measures 3 inches (7.62 cm) across, picture by the author


Cutting the rolled dough with the biscuit cutter, placing it on a cutting board and getting ready to poke evaporation holes into the biscuits, pictures by the author

Instead of dividing the dough into three to five pieces, rolling them into a ball and then pressing them flat, as I did the first time I made this recipe; this time I rolled the dough out flat with a rolling pin until it was a half inch (1.27 cm) thick.  When I was done rolling the dough out, I cut out the biscuits with my biscuit cutter, although you could use a drinking glass just as easily.  It helps to lightly flour whatever surface you are rolling your dough on, as well as lightly flouring the rolling pin; also dip your biscuit cutter or glass into flour as well.


Poking evaporation holes into the cut-out biscuits, picture by the author.
  
Mr. Pavlick’s recipe calls for using a pizza docker or ice pick to make evaporation holes into the biscuits before baking.  I didn’t have a pizza docker or an ice pick, so I used a meat fork on my last batch and a dinner fork on my first batch.
 
Just out of the oven and dehydrating while they cool, picture by the author.
  
After the biscuits are baked, it is very important that you let them continue to dry for several days.  On one of my earlier batches, I made the mistake of putting them into plastic storage containers before they were fully dehydrated: they turned all green and fuzzy with mold before I could eat them.
 
The biscuits are now done, enjoy!  Picture by the author.
 
An excerpt from Hardtack and Coffee, by J. D. Billings, page 114-115
  
Hardtack is one of the most indestructible foods you can carry, if it doesn’t get wet.  If it gets wet or if it is packed away too soon after baking, it will mold.  So, keep your hardtack dry!  If it is dry, and kept free of bugs, it will last almost forever.  I have been at museums that have pieces of hardtack from the American Civil War on display that are technically still edible, and I have seen pictures of even older pieces of hardtack that are on display at other museums. 

So, when you need a survival ration for your next wilderness adventure, perhaps you should carry some hardtack, it will last forever, and you certainly won’t be tempted to eat it until it is truly needed!

This piece of hardtack, is from the first batch that I ever made and is 12 years old, picture by the author.

  
I hope that you continue to enjoy The Woodsman’s Journal Online and my videos at BandanaMan Productions and don’t forget to follow me on both The Woodsman’s Journal Online and subscribe to BandanaMan Productions on YouTube, and if you have questions, as always, feel free to leave a comment on either site.  I announce new articles on Facebook at Eric Reynolds, on Instagram at bandanamanaproductions, and on VK at Eric Reynolds, so watch for me.


Sources

Billings, John Davis; Hardtack and Coffee: Or, The Unwritten Story of Army Life, [George M. Smith & Co., Boston, MA, 1889] page 114-117

Colleary, Eric; “CIVIL WAR RECIPE: HARDTACK (1861)”, June 26, 2013, [The American Table,], http://www.americantable.org/2013/06/civil-war-recipe-hardtack-1861/, accessed 11/29/2019

Farmer, Dennis and Carol; The King’s Bread, 2nd Rising: Cooking At Niagara, 1726-1815, [Old Fort Niagara Association, Inc., Youngstown, NY 1989]

Pavlik, Jeff; “Reproducing The Eighteenth-Century Biscuit”, Journal of the Early Americas, Volume1, Issue 11, April/May 2011, p. 7-11


Saturday, April 27, 2019

Trail Breakfasts 101: Chocolate Chia Breakfast Pudding


The assembled Chocolate Chia Breakfast Pudding pouch. Picture by Author.

I love chocolate, particularly dark chocolate...mmm…yummy!

I also like quick easy to make trail breakfasts, you know the ones that don’t take any cooking, don’t take much time to prepare and don’t make any dishes that need to be cleaned up.  That is why I like chocolate chia breakfast pudding and I think you will like it too.

For a video on chocolate chia breakfast pudding, you can go to my YouTube channel, BandanaMan Productions HERE or to The Woodsman's Journal Online HERE.

 
Basic Ingredients. Picture by Author.

Flavorings. Picture by Author.

Ingredients measured out. Picture by Author.
   
The recipe for chocolate chia breakfast pudding is simple and here is how you make it. 
To make a single serving combine the following in a one quart, Ziploc® style freezer bag.
        4 Tbsp (tablespoons) of chia seeds1
        1/3 cup of instant nonfat dry milk

Add any of the following to your Ziploc® style freezer bag, for flavor:
        2 Tbsp of Sweetened Flaked Coconut
        1/3 cup of Dried Banana Chips
        ¼ cup of Shelled Walnut Halves & Pieces
        ¼ cup of Seedless Raisins

Lastly, put a chocolate Carnation® Breakfast Essentials drink pouch into the Ziploc® style freezer bag and you are done: one trail breakfast assembled and ready to go.

This recipe will make one trail breakfast that weighs just 6 ounces, and is tasty and nutritious.

 
Information assembled by the Author.

To eat your trail breakfast, simply remove the Carnation® Breakfast Essentials drink pouch from the Ziploc® style freezer bag, tear it open, pour the drink powder back into the Ziploc® bag, and add ½ cup of water.  Seal up the Ziploc® bag and shake it up until it is fully mixed.  Let it sit for three to five minutes, then pull out your spoon, open the bag, dig in and enjoy!


Notes
1  You can substitute 2 Tbsp of chia seeds and 2 Tbsp of milled flax seeds for the 4 Tbsp of chia seeds, if you wish

Monday, March 11, 2019

Further Thoughts on Survival Rations … 1962 Civil Defense Style


Canteen cup, measuring cup and survival bar, picture by the Author


After I had published, “Survival Rations … 1962 Civil Defense Style”, which can be found [HERE], I received several questions from readers.

Wegmans brand Oats & Honey Flakes, picture by the Author

 The first question was, “you demonstrated making the ration bar with Wegmans brand Oats & Honey Flakes, where I live there aren’t any Wegmans stores, what type of cereal should I use?”

This is a very good question.  The recipe was not very specific about the type of cereal that was used, stating only “3 cups cereal – Oatmeal or Barley, Corn or Wheat Flakes”.  I used two cups of rolled oats and one cup of Wegmans brand Oats & Honey Flakes, because breakfast cereal is heavily fortified and I wanted the ration bar to have a higher nutritional content.  If I wanted to have a more accurate 1962 look to the bar or if there were no Wegmans where I live, I would have used two cups of rolled oats and one cup of Kellogg’s Corn Flakes.  The nutritional content of the ration bar with Corn Flakes is:


Kellogg’s Corn Flakes, picture by the Author

Nutritional information of survival ration with Kellogg's Corn Flakes, information condensed by the Author

 In addition, if you wanted to change the texture and make the survival bar chewier, you could substitute ½ or even one cup of the rolled oats for an equal amount of steel cut oats.  Next time I make these bars, I plan to substitute one cup of rolled oats for one cup of steel cut oats.  I will report back and let you know how this experiment turns out.  Substituting steel cut for rolled oats would not only change the texture of the bar, but it would also increase both the calorie and nutritional count. 

Wegmans Organic Steel Cut Oats

Nutritional information of survival ration with one cup of steel cut oats, information condensed by the Author

Nutritional information of survival ration with half cup of steel cut oats, information condensed by the Author


 The second question that I received was, “the recipe said the bar could be cooked with 2/3 of a canteen cup of water, how much water is that?”

Canteen cup and measuring cup, picture by the Author

 That is also a very good question and to answer your question I pulled out my 1941 US Army issue canteen cup to measure it.  During the 1960's, because of the sale of military surplus items, a canteen cup would have been very familiar to campers and other outdoors-people.  One full canteen cup measures three cups or 24 ounces and therefore a 2/3 canteen cup measurement is equal to two cups or 16 ounces of water.

The last question that I received asked, “You told us how the survival bar tasted when it was dry, how did it taste when it was cooked?”

Up until I was asked this question, I had only eaten these survival bars in their dry, uncooked and un-hydrated state, so I decided to experiment.  First, I put an 1/8 of a survival bar into a ¼ cup of cold water (a ¼ cup, is 1/8 of the two cups that the recipe called for) and let it sit without heating it.  I ended this experiment after 15 minutes and discovered that while the bar had softened a little, only the out layer that had softened to the consistency of cooked oatmeal.

1/8 of a survival bar soaked in ¼ cup of cold water for 15 minutes, picture by the Author


Second, I put a 1/8 of a survival bar into a ¼ cup of cold water, but this time I set it to boil.  In this experiment, the bar crumbled easily with a fork and dissolved into a watery oatmeal within three minutes and 53 seconds.

1/8 of a survival bar boiled in ¼ cup of water for 3 minutes, 53 seconds, picture by the Author

 In both cases, it was the texture of the bar that changed and not the flavor, which remained a rather yummy orange-honey-oatmeal flavor.

I hope that these answers helped and until next time, Happy Trails!

Sunday, February 17, 2019

Survival Rations … 1962 Civil Defense Style©


Picture by the Author


In October 2018, I posted a copy and wrote a review of Desert Survival: Information For Anyone Traveling In The Desert Southwest 1962 [HERE], and this weekend I decided to make and test, Mr. Lee Kelly’s “Survival Rations” recipe, which, was featured in this pamphlet.


Desert Survival: Information For Anyone Traveling In The Desert Southwest 1962, p.16


Picture by the Author


I found the recipe to be very complete and easy to use.  I listed, below, the modifications or the things that I did, where the original recipe was not clear.


When I made this recipe, I used two cups of rolled oats and one cup of Wegmans brand Oats & Honey Flakes.  I substituted a cup of breakfast flakes for one of the cups of rolled oats that the recipe called for, because breakfast cereal is heavily fortified, and I wanted the ration to have a higher nutritional content. 


After mixing the cereal and rolled oats, I crushed the flakes by pressing the bottom of the metal mixing cup into the oatmeal and breakfast cereal; I did this to make the ration bar, denser.  After smashing the flakes, I continued to mix in the rest of the dry ingredients, except the gelatin.


When I had boiled the water, honey and gelatin and mixed it into the dry ingredients, there were some dregs left in the pot that I had boiled the honey and gelatin in.  So, I added two more tablespoons of water to the pot, swirled it around and then added it to the ingredients, to wet the mix completely.


Pictures by the Author


I then mixed and kneaded the dough with my hands, until everything was combined and then I split the dough into two equal pieces and pressed them into the mold.


The recipe called for a bar that was two inches wide by five inches tall and one and a half inches thick, which makes a 15 cubic inch bar.  My mold is four inches wide, 5 inches tall and one inch deep, and I packed the dough into the mold until the ration bar was about ¾ inch thick.  By bar when finished it was also a total of 15 cubic inches.  

 
Picture by the Author


I dried the bar for two hours, an hour on each side, at 200o F and when they were done, I had two survival ration bars that weighed one pound each. 


Information condensed by the Author


I had the bars taste tested by four very through and competent judges, my children, and my youngest son’s 14-year-old friend.  My 14 year old thought that they were “great” and my 19 year old said that they tasted “okay” and that “they were better than hardtack”, which I think means that they are good.  My 23 year old said “these are very good … they have a good texture … they taste kind of like apples” and my youngest son’s friend thought that they were “okay”.  So, that made two polite statements of indifference and two positive reviews.  Personally, I like the way they taste, and I think that they have the flavor of orange blossom honey.  I liked them and I hope that you try them.


Picture by the Author


Sources:

Civil Defense Joint Council, Desert Survival: Information For Anyone Traveling In The Desert Southwest 1962, (Maricopa County; Phoenix, Arizona [1962]) reprinted in http://docs.azgs.az.gov/SpecColl/1988-01/1988-01-0026.pdf, p. 5-20