 |
| The New and Improved Emergency Tinfoil Pot, Photo by the Author |
The idea for this article started with an essay for a couple
item survival kit that I have been working on.
This survival kit includes tin foil, which can be used for many survival
tasks, from signaling, as an emergency head covering, as heat reflector to
throw heat from your fire towards you, or as an emergency survival pot, in
which to boil water and kill any disease causing organisms in it.
The book, Games And Recreational Methods For Clubs,
Camps And Scouts, first published in 1924, had on page 352, a detailed
description how to make a shallow pot from heavy paper or birch bark, to boil
water for tea in. I found several other
early examples, explaining how to create a shallow pan for cooking in the
wilderness, one that suggested using tin foil to create a shallow pan for
frying. So, I decided to build one and
test it.
To build a shallow cooking pan, take a square piece of
tin foil, regular or heavy-duty, either eight or twelves inches square. First, fold it across the corners from A to
D: it is very important for the piece of aluminum foil to be square so that it
folds diagonally, easily. Next, unfold
it and fold it again diagonally from B to C.
Now, unfold it again, and then fold up all four sides, one inch in from
the edges, at EF, GH, IJ and KL. The
diagonal folds will help make corner pleats, which should be folded flat
against the outside of your pan. You need
to pin or clamp the corner folds down with a split green stick, and then your
shallow cooking pan is done.
 |
| Folding Diagram for Tinfoil Pan, Drawing by the Author |
 |
| Step One, Photo by the Author |
 |
| Step Two, It is important to fold the corner pleats flat against the
outside of your pan, Photo by the Author |
 |
| Finished Tinfoil Pan, Photo by the Author |
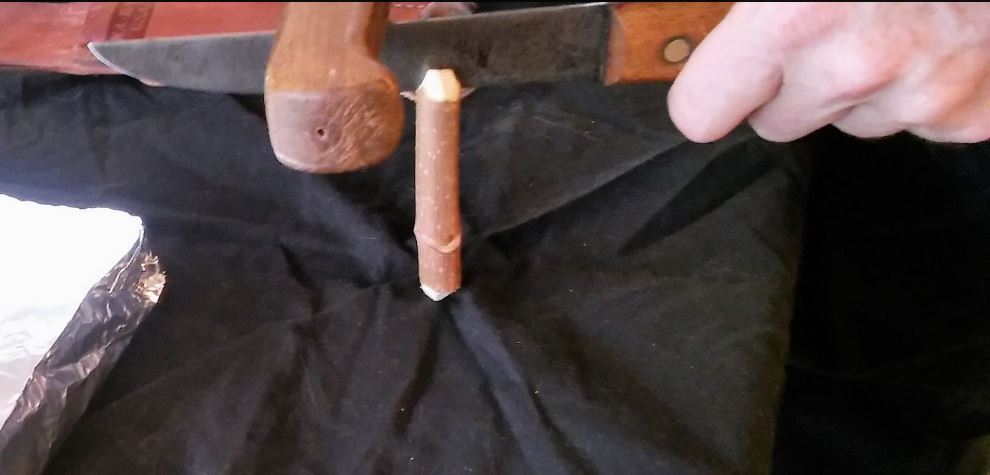
To make split stick corner clamps, cut four sections from
a green stick that is between ¼ and ½ inch thick into lengths about two or
three inches long. Using a fixed blade
knife, split the stick down the middle by batoning the blade with another
stick: the splits should be no more than 1 to 1-½ long.
 |
| Peg Making, Needed Supplies and Tools, Photo by the Author |
 |
| Peg Making, Step One, Batoning the Peg, Photo by the Author |
 |
| Peg Making, Step Two, Finished Peg, The small stick pushed into the
split, keeps it open until you have slid the peg over the tinfoil, remove the
stick to close the peg, Photo by the Author |
It was damp and cold when I tested out this model of
tin foil pan, I started a fire and let it burn down to coals, which I raked
forward while keeping the fire lit behind it.
The pan that I built was made from a 12-inch-by-12-inch piece of
heavy-duty, aluminum foil, and I was not impressed with this pan: it did not
hold much water, it tended to buckle and spill water into the hot coals and it
accumulated ash, bark and other fire debris.
It was not a complete failure, the water did start to boil, but it just
was not a complete success, either. For
a video of this aluminum foil pot in action, see my YouTube channel at https://youtu.be/QQKbzjnBOYs
 |
| Test of the Tinfoil Pan, Photo by the Author |
Therefore, I went back to the drawing board and came
up with a different design. I started
with a piece of heavy-duty, aluminum foil, 24 inches long by 12 inch wide, that
I folded in half so that I had a 12-inch-by-12-inch square of doubled aluminum
foil. Next, I folded over a ½ inch on
both of the two sides, AB and GH, and then I folded over a ¼ inch on both of
the same two sides again, twice at CD, EF and IJ, KL, to make sure I had a good
seal. To make the pot stand upright, I
folded over diagonally, 2 inches on each of the bottom corners, MN and OP, and
then flattened the bottom of the pot.
Lastly, I folded the top ½ over at QR and then folded the top ¼ over again
at ST, to make a rim. When done the pot
is about 9 inches tall and about 4-½ inches around at the top.
 |
| Folding Diagram for Tinfoil Pot, Drawing by the Author |
 |
| Step One, Photo by the Author |
 |
| Step Two, Photo by the Author |
 |
| Finished Tinfoil Pot, Photo by the Author |
I tested this aluminum foil pot on a new fire, on a
different cold rainy and day and had much better results. This pot, although it took a lot more folding
to make it, is much sturdier, more stable, does not spill water over the rim
onto your fire and it holds well over a quart of water. In addition, while it doesn’t hurt to rake
coals out for it to sit on, you can put the pot at the edge of the fire and let
the flames heat the closest side, for quicker results than you would get with
the shallow pan. For a video of this
aluminum foil pot in action, see my YouTube channel at https://youtu.be/nVPosvejZY0
So, if you are “misplaced” in the woods and you forgot
to bring a pot or big cup with you, I hope that you remembered to pack several
feet of aluminum foil in your survival kit, that way you build an aluminum foil
pot and boil and kill any disease causing organisms in your water, so that you
can safely drink it.
Sources:
Charles F. Smith, Games And Recreational Methods
For Clubs, Camps And Scouts, [Dodd, Mead and Company, New York, 1925], p.
352


It is a great survival technique
ReplyDeleteI am so glad that you enjoyed it! Best of luck and Happy Trails!
ReplyDelete