For my readers who are
Boy Scouts in the United States, this article can help you with First Class
requirement 3d, “Use lashings to make a useful camp gadget or structure” –
Author’s Note.
“It
will be dark in an hour, it looks like rain and I am lost”, you think, as
you start to panic! “No, stop, wait a
second, remember that post on The Woodsman’s Journal Online, it said that you
are only as lost as you think you are”, you say to yourself, as you try to
calm yourself down. “It’s going to
rain ... first things first, I need a shelter ... I have a poncho, but how do I
make a survival tripod”, you wonder as you begin to list your survival
priorities?
If
you are lucky, the easiest way to build a quick shelter is to find one or two
pieces of forked ground wood that are right length and thickness, to serve as
spars or legs, which you can prop up against the trunk of tree or against each
other and another length of wood to make a tripod. I say “do you feel lucky” because, if
you are in an emergency-situation or you are injured it might be difficult to
find ready-made, naturally forked lengths of wood of the size that you need1.
You
should never trust to luck in an emergency because, that is when luck will
desert you, and that is why you should know how to build a survival tripod, which
you can build by lashing three spars together with string2.
With
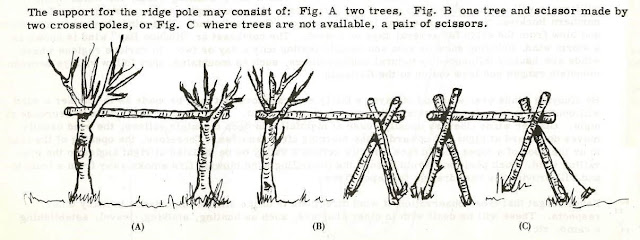
a tripod you can either build a tepee-style shelter, a long lean-to shelter
(Fig. 1, below), or a 3-pole lean-to (Fig. 2, below), depending on your needs
and what you have to go over it.
The
easiest and simplest way that I have found over the years to rig up a quick, easy,
and sturdy tripod is with the “tripod lashing for light structures” as taught
by the Boy Scouts of America.
 |
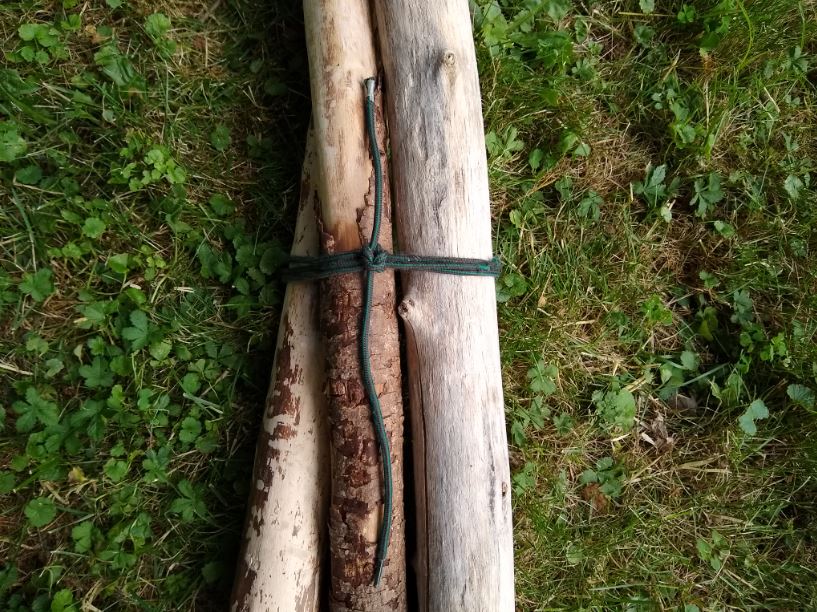
| Step One of tying a tripod lashing for a light structure, using a 55 inch (140 cm) long shoelace, photograph by the author. |
While
holding the spars or legs of your tripod together, place the beginning of the
rope in the groove between two of the legs and then wrap over the rope end and
down towards the base of the legs a couple of times, until you are near the end
of your rope.
 |
| Step Two of tying a tripod lashing for a light structure, pushing the end of the shoelace up the groove that contains the beginning of the shoelace, photograph by the author. |
Push
the end of your rope, up the groove that contains the beginning of your rope
and then tie the two ends in a square knot, right over left, and then left over
right.
 |
| Step Two of tying a tripod lashing for a light structure, tying the square knot in the shoelace, photograph by the author. |
 |
| Step Three of tying a tripod lashing for a light structure, opening the legs of the tripod into a tepee-style shelter, photograph by the author. |
 |
| Step Three of tying a tripod lashing for a light structure, opening the legs of the tripod into a 3-pole lean-to, photograph by the author. |
Open
the legs of your tripod into whatever shape your shelter calls for.
 |
| Step Four of building the tepee-style shelter, putting extra supports onto the tripod, photograph by the author. |
 |
| Step Four of building the tepee-style shelter, putting the author’s Swiss-made rain cape onto the tripod to make a shelter, photograph by the author. |
“Okay,
I have a shelter to wait out the rain, now all I have to do sit tight until
morning”, you say to yourself, “I think I should be alright...”
I
hope that you continue to enjoy The Woodsman’s Journal Online and look for me
on YouTube at Bandanaman Productions for other related videos, HERE.
Don’t forget to follow me on both The
Woodsman’s Journal Online, HERE,
and subscribe to BandanaMan Productions on YouTube. If you have questions, as always, feel free
to leave a comment on either site. I
announce new articles on Facebook at Eric Reynolds, on Instagram at
bandanamanaproductions, and on VK at Eric Reynolds, so watch for me.
That
is all for now, and as always, until next time, Happy Trails!
Notes
1
If you remembered to bring a hatchet or a belt knife with you, you could always
cut saplings and branches to fit, but if not, you are going to have to depend
on luck to find the right size piece of ready-made, naturally forked wood for
the spars or legs of your shelter.
2
That
is, provided of course, that you have some string or rope, which is one of the
rarest of items in a survival situation and you should always, always carry
some with you. However, unless you are
Cody Lundin, you are probably wearing shoes and that means you do have some
string with you, your shoelaces. You
should still always have some around your wrist, around your Nalgene bottle, in
your survival kit or pocket, just in case you need to use your shoes and make a
shelter, at the same time.
Sources
Boy
Scouts of America; Knots And How To Tie Them, [Boy Scouts of America,
2002 printing of the 1978 Edition], page 30
Innes-Taylor,
Alan; Arctic Survival Guide, Scandinavian Airlines Systems, Stockholm,
Sweden, 1961], page 54-58


