Sunday, January 27, 2019

Making an Emergency Bough Bed ©


Basic Cold Weather Manual FM 31-70, p 55

Imagine that you are caught out in the wilderness, for one reason or the other and you are now having an unexpected adventure.  At 35o Fahrenheit, it is warm for early January, but you know that tonight it will drop into the low 20s .  You know that you will lose a great deal of heat to ground conduction and that you need to make an emergency bough bed.  Bough beds are also called ground beds, bush beds or browse beds and are used to insulate you from the heat robbing ground.  But how do you make one?  And how many boughs do you need?

Since I didn’t know the answer to the second question and since it is the week after New Year’s and it is time to repurpose the old Christmas tree I did an experiment…

You can use anything to make a bough bed as long as it is fine at the tips and no thicker than your thumb at the stem, other materials are things like branches with or without leaves, cattails, golden-rod stems, ferns, clover or grasses.  They should be dry, so shake off any moisture or snow before putting them into your bough bed.

All of the old books speak of pushing the stem end of the bough into the ground to make the most comfortable mattress.  However, in a survival situation you are not interested in maximizing your comfort: you are interested in minimizing the time it takes to build the bough bed, your energy expenditure and your sweat.  In a survival situation, you should use the Mors Kochanski method, with the branches in a chevron pattern and the boughs making an angle close to 90o.

 
Chevron Pattern, drawn by the author, per Mors Kochanski


 Put bare branches, branches or saplings bigger than your thumb on the ground first, and then put the smaller branches on top of them.  As you cut off the branches from the base of the trunk to the crown, lay the bottom branches down first, then lay the middle branches down next and finally place the top branches down last.
  
Bush Bed, drawn by the author, per Mors Kochanski


Remember whatever you use to build your bough bed is going to compress under your weight.  So how much should you use?

Mors Kochanski wrote that to make a bough bed you need to have a compressed thickness of at least 4 fingers or about 3-1/2 inches of dead air space between you and the ground or snow as insulation.  However, more is better, and some experts recommend 2 to 3 feet of uncompressed branches.

I cut the limbs off a 7-foot tall balsam fir tree, and after trimming the branches off the trunk, I had about 50 branches.  This made a pile 28 inches square on a side and 28 inches tall.  When I compressed this pile, it compacted down to just 18 inches tall.

A pile 28 inches by 28 inches is a big enough bough bed for me to sit on, which is fine if I am going to spend the night leaning up against a tree.  However, since the boughs compressed to 18 inches deep I could also spread them out so that the bough bed measured 28 inches wide by 56 inches long and still have 9 inches of compressed boughs beneath me, if you want to lay down.

That is the basics of building an emergency bough bed.

However, before you decide to practice this outdoors, first let us talk about safety.

The first time that you practice this, you should do it in a controlled setting, like in your back yard or just off the trailhead within 100 yards or so from your car.  In addition, whenever you go into the wilderness you should always take a buddy with you.

The most important thing to remember when building an emergency bough bed is location, location, location!  You should always check the following, wind, water, widow-makers and wildlife.

Remember that at night the winds will reverse and will flow downhills, valleys and gullies.  If possible, find a spot that has a windbreak on two sides to protect you from both downhill and down valley winds. 
It is never a good idea to shelter in valley bottoms and low spots since they can flood.  Always try to build your shelter half way up the valley wall or the hillside as the cold air will settle in valley bottoms and other low spots at night and hilltops can be cold as well.  If you have to shelter near creeks or rivers, look for grass and debris caught in the branches of shrubs, as this is evidence of past floods.  Also on the trunks of trees near the creek or river, look for chipped bark and other damage, as this can be an indication of ice jams and flooding.   

Always look up before you set up your shelter, to make sure there aren’t snags, broken limbs or other widow-makers hanging in the branches above you that can come crashing down on your shelter.

Use common sense when it comes to wildlife, don’t camp on a game trail, near beehives or near mosquito breeding grounds, or you might have unwelcome visitors.

Much like Native Americans, trappers and other early explorers of the North American Wilderness and like modern survival experts, such as Les Stroud, I always bring an axe with me.  It is not impossible to make a bough bed without an axe, but it is much harder.  If you don’t have an ax, you can still make a bough bed; however, you are limited in what you can use to build it, to things that you can break with your hands.  It is easier to build a bough bed without an ax in the summer than in the winter, but I have done it in both seasons.

Bernard Mason, writing about ax safety, in Woodsmanship said it best, when he recommended that you always swing your ax over your head and in a circle parallel to the ground to make sure that you ax doesn’t catch or get deflected by anything before you start cutting.  The Boys Scouts of America call this checking you blood circle.  Axes that are caught or deflected can cut you and by insuring that no one is within the reach of your ax, you can prevent your unexpected adventure from turning into a medical emergency.
  
Woodsmanship, Bernard S Mason, p 19

Bernard Mason also noted that lopping off branches can be very dangerous, because if the ax glances off and it hits you then you will be adding a medical emergency to you unexpected adventure which could have serious or fatal results.  When you cut off the branches, to be safe, always stand so that the trunk is between your legs and the branch you are cutting, start at the base of the trunk and cut toward the crown, and cut the branches off parallel to the trunk.  The author of Woodsmanship also recommended, that instead of cutting off dead and dry branches with the blade of the ax, that you should break them off with the poll, also known as the butt, of the ax head, since the hard, dead branches can dull your ax.
  
Woodsmanship, Bernard S Mason p 21

The last safety measure to consider when you build an emergency bough bed is take your time, don’t work up a sweat, remove layers as you warm up, in an unexpected adventure wet clothes KILL!

A video presentation of this article can be found [HERE].  Look for me on YouTube at Bandanaman Productions for other related videos [HERE].

And as always, until next time, Happy Trails

Sources:

Headquarters, Department of the Army, Basic Cold Weather Manual FM 31-70, [Washington D.C., April 12, 1968] p 55 (accessed 1/24/2019) https://upload.wikimedia.org/wikipedia/commons/c/c8/FM-31-70-Basic-Cold-Weather-Manual.pdf

Mors L. Kochanski, Bush Craft, [Partners Publishing, Edmonton, AB., 2014] p.174

Bernard S. Mason, Woodsmanship, [A. S. Barnes and Company, New York, 1954] p 19 & 21 (accessed 1/24/2019) https://archive.org/details/Woodsmanship_Bernard_Mason/page/n19

Sunday, December 30, 2018

Modern Survival: Outdoor Gear and Savvy to Bring You Back Alive, 1979, Part Two

The cover of, Modern Survival: Outdoor Gear and Savvy to Bring You Back Alive, 1979, by Dwight R. Schuh

  
On October 30 of this year, I wrote a review of the first two chapters of, Modern Survival: Outdoor Gear and Savvy to Bring you Back Alive (found here).  I finished reading the book, as promised; here is my review of the rest of the book.

The author, Dwight R. Schuh, advanced three points when he wrote into Modern Survival.  First, to remain alive you must follow six principals.  Second, you must learn basic outdoor skills and should not rely solely on modern technology.  And third, a basic survival pack and first aid kit must always be carried on your person, when you venture into the wilderness.  The author felt that if you took the proper care, acted responsibly and followed these points, then you would not find yourself “…in a predicament that demands primitive skills for survival”.

To recap from my earlier article, the first point of this book is “…that to survive means to ‘remain alive and existent’ and to survive you must follow the six principals outlined in chapter one, which are listed below. 

1.   Outdoors emergencies are rarely acts of God” 

2.   Disaster can happen to you

3.   Emergencies can happen at any time

4.   You should plan for the worst

5.   Prevention is the best medicine


6.   Learn to live with the outdoors, not to fight it1


Writing in 1979, the author, Dwight R. Schuh, wrote, “Surrounded by technological marvels, people can easily become complacent”.  The author’s second point is that you cannot become complacent and expect technology to take the place of learning, “the minimum knowledge needed for everyday outings”.  While this message was not explicitly set to paper until chapter fourteen, it is implied throughout chapters two through fourteen.  In these chapters a number of different activities and outdoor skills, such as how to find your way, how to build a fire or a shelter, or other important outdoor skills, were explained.  He wrote further that when advanced technology is absent or it fails, “You’re suddenly thrust back to a primitive age.  Advanced technology is forgotten.  Survival now depends strictly on what you know and do”.2 

This was true then and it is even more likely to happen today.  I am reminded of a time when I was hiking with my family on a clear and sunny day, in late October, in the central Alleghenies, we chanced upon some other hikers, wearing only flip-flops, shorts and tee shirts.  They asked us how to get back to the main road.  They had decided to venture out into the wilderness without the proper clothes or footwear, without any survival supplies, without a map and compass, and with only a cell phone to help them find their way.  They had become lost when, their cell phone had run out of charge, and since their map and compass were apps on their cell phone, once they were turned around, they had no idea where they were.  I pulled out my map and compass, and soon had them heading in the right direction. 

The author’s third point is that you should always “Prepare an adequate equipment kit for your chosen activity, and have it with you when you are in the field”.  He added further, “…a survival pack must be a constant companion”, before finishing with, “whenever you head into the field, regardless of the nature or length of your outing, grab that survival pack.  Have it with you always3.  Chapter fifteen includes a list of items to be included in your survival pack and your first aid kit and a list of items specific to various situations and vehicles, developed by the author, with explanations for the uses and importance of each item suggested.  The survival pack that the author recommends follows the suggestions of the 10 Essentials, which first appeared in the 1974 edition of Mountaineering: The Freedom of the Hills4. 

Going back to the incident in the central Alleghenies that I mentioned above, before I sent them on their way, I explained the importance of the 10 Essentials to them and suggested that in the future they should make sure they carry them.  The 10 Essentials Systems are away of prioritizing items that should be carried with you whenever you head out into the wilderness, and there purpose is to be able to answer ‘yes’ to the following two questions; can you respond positively to an accident or emergency and can you safely spend one or more nights in the wilderness.  The 10 Essentials Systems are5:

1.     Navigation, you should never go into the woods without a map and compass, since they never run out of power, if you take electrical items such as altimeters, GPS devices, or PLB or satellite communicators, always bring extra batteries or battery packs.

2.     Headlamp, always bring a flashlight or headlamp, the headlamp being the better of the two options as it is hands free.  You should always bring extra batteries.  The author of Modern Survival, had an interesting wrinkle on flashlights, he suggested that you turn one battery backwards, which in a multi-battery flashlight would stop the light from working, so that the batteries won’t drain if the switch accidently gets turned on.

3.     Sunscreen rated to SPF 30, sunglasses, a hat, bandana, long shirt and pants or other sun-protective clothes.

4.     First aid kit, which should include foot care and insect repellent, if it is bug season.

5.     Knife, along with a knife you should always carry a repair kit and a multi-tool.

6.     Fire making equipment, such as matches, candle, lighter and tinder, or particularly during the winter, a stove and fuel.

7.     Emergency shelter, you should always carry some way to protect yourself from the elements: a light emergency bivy, two 55-gallon heavy-duty trash bags, a poncho, etc.

8.     Extra food, you should always carry some emergency rations, over and beyond what you need for your outing.

9.     Extra water, you should always carry more water than you expect to need, or the means to purify water you find.

10.   Extra clothes, the exact clothing that you bring depends on the weather that you expect to experience, however an extra pair of socks, a knit cap, and a jacket are the minimum you should carry.

The hikers that I crossed paths with were lucky, their adventure in the woods ended well, but the central Alleghenies in the late fall are not a good place for the unprepared.  This whole incident would have been avoided if they had known of and carried the 10 Essentials on them or in an easy-to-carry survival pack.  If I had not chanced upon them, while they might not have died because of their lack of planning, at the very least they would have had a very uncomfortable and unexpected adventure.

Just as I enjoyed the first two chapters of Modern Survival: Outdoor Gear and Savvy to Bring You Back Alive, by Dwight R. Schuh, I enjoyed reading the remaining thirteen chapters of this book, as well.  Again, I recommend that if you own a copy of this book, dust it off and reread it, and if you don’t own a copy, find one and give it a chance, I think that you will like it, I did.

Notes:
1  Dwight R. Schuh, Modern Survival: Outdoor Gear and Savvy to Bring You Back Alive, p. 2-6

2  Dwight R. Schuh, Modern Survival: Outdoor Gear and Savvy to Bring You Back Alive, p. 147

3  Dwight R. Schuh, Modern Survival: Outdoor Gear and Savvy to Bring You Back Alive, p. 162-163

4  The Mountaineers, “What Are The Ten Essentials?”, (February 2018) https://www.mountaineers.org/blog/what-are-the-ten-essentials, (accessed 12/28/2018)

5  Ibid.,

6  I had heard of this before I read about it in Modern Survival and so, I decided to test it out; in a multi-battery flash light this works and the flash light will not turn on, in a single battery flash light it does not work and the flash light will turn on.
Dwight R. Schuh, Modern Survival: Outdoor Gear and Savvy to Bring You Back Alive, p. 163

Sources:
Dwight R. Schuh, Modern Survival: Outdoor Gear and Savvy to Bring You Back Alive, (David McKay Company Inc., New York, NY [1979])

The Mountaineers, “What Are The Ten Essentials?”, (February 2018) https://www.mountaineers.org/blog/what-are-the-ten-essentials, (accessed 12/28/2018)


Wednesday, December 26, 2018

The End of 2018 and the Beginning of 2019 ©


It is the end of 2018 and The Woodsman’s Journal Online is officially three months old.  It has been a busy three months, and I would like to thank everyone who has visited the Woodsman’s Journal and read my articles or has watched my videos at Bandanaman Productions on YouTube.  Thank you and I hope that the coming New Year is kind to you.

At the end of this old year and the beginning of the new, I want to take a moment to define and refine the mission statement for both the Woodsman’s Journal and Bandanaman Productions.  Over the last twelve years, ever since I started teaching wilderness and survival skills, I have found that that the part of this journey that I enjoyed as much as being out in the wilderness doing things or teaching people how to thrive in the outdoors; was doing the research. 

I am a voracious reader and researching how to do things in the woods or authentic woods lore from 18th, 19th, 20th and 21st centuries is something that I enjoy and is, if I do say so myself, something that I have gotten very good at.  So…

The mission of The Woodsman’s Journal Online and Bandanaman Productions is to be the best-researched resource available to the online user.  My articles and videos are intended to be a compilation of my research, this way you the reader or viewer, will not have to spend your time doing the research that I have already done.  So that you can gather more information for yourself, if you choose, I will always provide a list of the sources I have consulted and endnotes when and where needed. 

 
A note on Evidence and Positive Proof, a selection from Williams, A Compendious and Comprehensive Law Dictionary, 1816

To be the best-researched resource available, I will follow the rules and practices outlined below.  To provide proper evidence and conclusions, and to establish positive proof, I will always use at least three sources for every article, whenever they are available.  When three different sources are not available and there cannot be positive proof, which is very likely when researching antique woods lore from the 18th and early 19th centuries, since everyday skills of everyday people, were generally not recorded, as they were not deemed important; I will use circumstantial evidence and the doctrine of presumption.  The doctrine of presumption states that, “…when the fact itself cannot be demonstratively evinced, that which comes nearest to the proof of the fact is the proof…” (Williams, 1816).  I will always tell you when I am using circumstantial evidence and the doctrine of presumption.

 
A section from Miller’s Camp Craft, 1916, p. 168

Lastly I will always tell you when I have not actually done something myself and I am reporting someone else’s experience.  In addition, I will endeavor, whenever practical, to experiment with the techniques, methods and tips and then report to you on the results.

Again, a most heartfelt “Thank You” to everyone who has visited the Woodsman’s Journal and read my articles or has watched my videos at Bandanaman Productions on YouTube; I wish the best to you for the coming New Year.


Sources:


Thomas Walter Williams, A Compendious and Comprehensive Law Dictionary; Elucidating the Terms and General Principals of Law and Equity, [Printed for Gale and Fenner, Paternoster Row, London, 1816], EVIDENCE p. 2 https://books.google.com/books?id=sw8yAAAAIAAJ&printsec=frontcover&source=gbs_ge_summary_r&cad=0#v=onepage&q&f=false, (accessed 4/18/2017)

Friday, December 21, 2018

An Emergency Survival Pot or Boiling Water in Tinfoil


The New and Improved Emergency Tinfoil Pot, Photo by the Author

The idea for this article started with an essay for a couple item survival kit that I have been working on.  This survival kit includes tin foil, which can be used for many survival tasks, from signaling, as an emergency head covering, as heat reflector to throw heat from your fire towards you, or as an emergency survival pot, in which to boil water and kill any disease causing organisms in it.

The book, Games And Recreational Methods For Clubs, Camps And Scouts, first published in 1924, had on page 352, a detailed description how to make a shallow pot from heavy paper or birch bark, to boil water for tea in.  I found several other early examples, explaining how to create a shallow pan for cooking in the wilderness, one that suggested using tin foil to create a shallow pan for frying.  So, I decided to build one and test it.

To build a shallow cooking pan, take a square piece of tin foil, regular or heavy-duty, either eight or twelves inches square.  First, fold it across the corners from A to D: it is very important for the piece of aluminum foil to be square so that it folds diagonally, easily.  Next, unfold it and fold it again diagonally from B to C.  Now, unfold it again, and then fold up all four sides, one inch in from the edges, at EF, GH, IJ and KL.  The diagonal folds will help make corner pleats, which should be folded flat against the outside of your pan.  You need to pin or clamp the corner folds down with a split green stick, and then your shallow cooking pan is done.


Folding Diagram for Tinfoil Pan, Drawing by the Author
Step One, Photo by the Author


Step Two, It is important to fold the corner pleats flat against the outside of your pan, Photo by the Author

Finished Tinfoil Pan, Photo by the Author

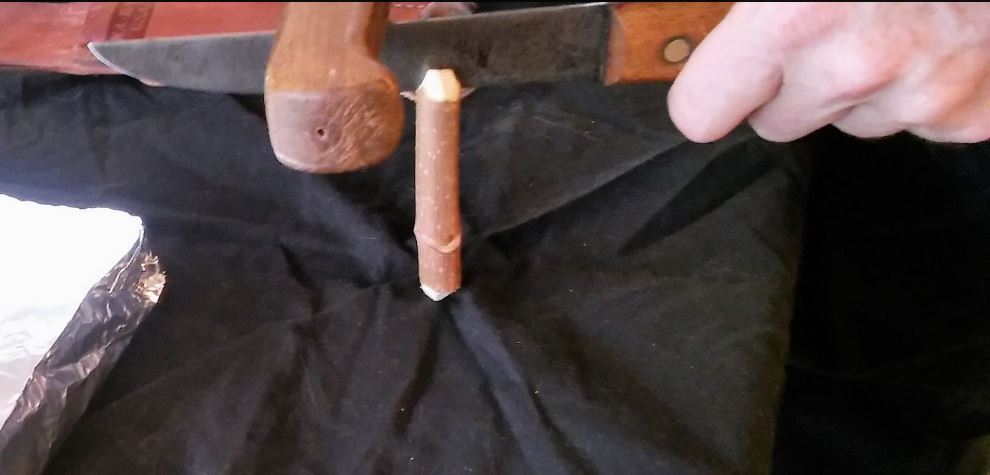
To make split stick corner clamps, cut four sections from a green stick that is between ¼ and ½ inch thick into lengths about two or three inches long.  Using a fixed blade knife, split the stick down the middle by batoning the blade with another stick: the splits should be no more than 1 to 1-½ long.

Peg Making, Needed Supplies and Tools, Photo by the Author

Peg Making, Step One, Batoning the Peg, Photo by the Author

Peg Making, Step Two, Finished Peg, The small stick pushed into the split, keeps it open until you have slid the peg over the tinfoil, remove the stick to close the peg, Photo by the Author


It was damp and cold when I tested out this model of tin foil pan, I started a fire and let it burn down to coals, which I raked forward while keeping the fire lit behind it.  The pan that I built was made from a 12-inch-by-12-inch piece of heavy-duty, aluminum foil, and I was not impressed with this pan: it did not hold much water, it tended to buckle and spill water into the hot coals and it accumulated ash, bark and other fire debris.  It was not a complete failure, the water did start to boil, but it just was not a complete success, either.  For a video of this aluminum foil pot in action, see my YouTube channel at https://youtu.be/QQKbzjnBOYs

Test of the Tinfoil Pan, Photo by the Author

Therefore, I went back to the drawing board and came up with a different design.  I started with a piece of heavy-duty, aluminum foil, 24 inches long by 12 inch wide, that I folded in half so that I had a 12-inch-by-12-inch square of doubled aluminum foil.  Next, I folded over a ½ inch on both of the two sides, AB and GH, and then I folded over a ¼ inch on both of the same two sides again, twice at CD, EF and IJ, KL, to make sure I had a good seal.  To make the pot stand upright, I folded over diagonally, 2 inches on each of the bottom corners, MN and OP, and then flattened the bottom of the pot.  Lastly, I folded the top ½ over at QR and then folded the top ¼ over again at ST, to make a rim.  When done the pot is about 9 inches tall and about 4-½ inches around at the top.

Folding Diagram for Tinfoil Pot, Drawing by the Author

Step One, Photo by the Author


Step Two, Photo by the Author

Finished Tinfoil Pot, Photo by the Author

I tested this aluminum foil pot on a new fire, on a different cold rainy and day and had much better results.  This pot, although it took a lot more folding to make it, is much sturdier, more stable, does not spill water over the rim onto your fire and it holds well over a quart of water.  In addition, while it doesn’t hurt to rake coals out for it to sit on, you can put the pot at the edge of the fire and let the flames heat the closest side, for quicker results than you would get with the shallow pan.  For a video of this aluminum foil pot in action, see my YouTube channel at https://youtu.be/nVPosvejZY0

So, if you are “misplaced” in the woods and you forgot to bring a pot or big cup with you, I hope that you remembered to pack several feet of aluminum foil in your survival kit, that way you build an aluminum foil pot and boil and kill any disease causing organisms in your water, so that you can safely drink it.

Sources:

Charles F. Smith, Games And Recreational Methods For Clubs, Camps And Scouts, [Dodd, Mead and Company, New York, 1925], p. 352


Wednesday, December 12, 2018

The Ace of Spades: Survival Basics ©


Sea to Sky Photography sells Discover Wilderness Survival playing cards with 52 survival strategies and techniques printed on them.  In this deck, the ace of spades is titled “Survival Basics”; it could also have been titled, “Survival Psychology”, “It CAN Happen To You” or even “The Seven Deadly Enemies of Survival”, since these are the lessons that are being taught on this card.

Sea to Sky Photography sells Discover Wilderness Survival playing cards with 52 survival strategies and techniques printed on them.  In this deck, the ace of spades is titled “Survival Basics”; it could also have been titled, “Survival Psychology”, “It CAN Happen To You” or even “The Seven Deadly Enemies of Survival”, since these are the lessons that are being taught on this card.

Knowing that, “It CAN Happen To You”, you can prepare yourself physically, make sure that you have the proper equipment and mentally prepare yourself by having the necessary training to use your equipment and deal with any emergencies, before you go into the wilderness.  You should keep in shape and see a doctor on a regular basis to make sure that you are “expedition ready” and are physically capable of meeting the challenges you will find in the backwoods.  You should make sure that you have the proper equipment to survive and enjoy the environment that you will be exploring.  This includes a first aid kit that is appropriate for the potential medical emergencies that you might encounter in the backcountry and the Ten Essentials, which should always be carried on your person.  Lastly, you should ensure that you are mentally prepared for the tasks and situations that you will find during your trip into the wild, because this will build your confidence and help you fight your fears and panic.  Take classes and read books to learn the techniques and skills that you will need and then practice them BEFORE you leave home.  Learning new skills, when you have to get them right the first time, because your life depends upon it, is a recipe for disaster.

“The Seven Deadly Enemies of Survival” are a hierarchy of obstacles to your survival, ranked in the order of importance, which may present themselves singly or in groups.  You will have to overcome these enemies, if you find yourself in a wilderness survival situation.  Most people assume in a survival situation, that their biggest challenge will be a physical or environmental one, but this is wrong, you and the internal, psychological obstacles of your own fears and anxieties, your boredom and loneliness are the greatest obstacles that you will have to overcome to survive.  If you fail to control them, you will panic or you will become depressed, in either case, you will not survive the emergency.  In addition, the physical or environmental obstacles that you will encounter can reduce your ability to think rationally, allowing your subconscious fears and anxieties, your boredom and loneliness to take control of your mind.  Again, if this happens, panic and depression will set in and you will not survive.

1.   Fear and anxiety, whether you become lost or disoriented or encounter a different emergency in the wilderness your immediate problem will be fear.  It is not a sign of weakness to feel fear during an emergency, in these situations fear is normal.  What is important is how you react to fear: do you panic or do you act rationally.

2.   Pain from an injury is nature’s way of letting you know that something is wrong.  Both pain and illness can make it difficult to think clearly and make you more susceptible to fear and panic.  Pain from a minor injury can be ignored if you keep your mind occupied with plans for survival.  However, it is important to remember that injuries, particularly severe ones must be dealt with immediately, as they can be life threatening or lead to life threatening illnesses or infections later. 

3.   Cold or heat are both greater threats to your survival than it might seem at the onset of the emergency.  Cold particularly will numb both your body and your mind and lowers your ability to think and your will to survive. Cold and heat also increases your chance of suffering ill effects from thirst.

4.   Thirst will dull your thinking, even when your dehydration is not extreme, and being thirsty increases your sensitivity to fear, pain, cold or heat.  As with hunger and pain, thirst can be ignored short term if you have a strong will to survive and you keep your mind busy.

5.   Hunger will reduce your ability to think clearly, and being hungry will increase your susceptibility to the weakening effects of fear, pain and cold.  Hunger is not critical in the short term, but it will does a factor in the long term.  Just as with pain and thirst, in the short term, hunger can be overlooked if you keep busy.

6.   Fatigue is almost impossible to avoid in survival situations, since your ability to sleep or rest will be limited and your limited food supply will not keep your body fully fueled.  Even a mild amount of fatigue can reduce your strength, coordination, judgement and your ability to think rationally.  Fatigue is likely to increase your chance of injury and the effects of fear, boredom and hopelessness.  By making a plan and prioritizing the necessary survival tasks, you can find ways to work smarter and reduce your energy expenditures, or by sleeping and resting when that is the most important task to accomplish, you can reduce fatigue.

7.   Boredom, loneliness, hopelessness or depression, are less immediate problems and can creep into your mind slowly, as the emergency continues, possibly when an expected event doesn’t happen, or when you are alone.  These are difficult obstacles to overcome and will dull your thinking and make you want to give up.  Just as with fatigue, creating and sticking to a plan for survival, identifying and prioritizing necessary tasks and keeping busy with those tasks, will keep you from growing bored or depressed. 

It is important to remember that fear, anxiety, boredom and depression can be controlled by using the S.T.O.P. acronym (Sit down, Think, Organize, Plan, prioritize and act).  The steps outlined in this acronym will help you control your subconscious fears by bringing your conscious mind to the forefront as you sit, think, organize your supplies and resources and create a plan for survival.  Afterwards, keeping busy with this plan will keep your conscious mind in control and will prevent boredom and depression, as well as keeping your subconscious fears and anxieties at bay.

The physical or external enemies of survival can be conquered by using the “Rule of Threes”.  This rule is useful as a planning tool, which helps you prioritize which of the deadly enemies of survival are the most critical to your survival at any moment.  The “Rule of Threes” states that you cannot survive for more than 3 Minutes without air or with severe bleeding.  You cannot survive for more than 3 Hours without shelter from a harsh environment, whether it is hot or cold, or you are in cold or icy water.  You cannot survive for more than 3 Days without water, but you can survive for 3 Weeks without food.  These rules assume that the rules above them have already been met, for example, if you have a large quantity of water, yet are bleeding severely, according to the three-minute rule, the most important task at that moment, is to stop the bleeding. 

If you accept that it can happen to you and you prepare before you enter the wilderness, you will reduce your chance of having an emergency.  In the event of an emergency in the backwoods, by planning and prioritizing survival tasks, you can take positive steps forward towards your survival, build your confidence, stay busy, keep your mind occupied, and fight fear, panic, boredom and depression.  Therefore, if you do end up in an emergency stay calm, make rational decisions, hope for the best but prepare for the worst and adopt the Marine Corp slogan of “Improvise, Adapt, Overcome”, these suggestions, the acronym S.T.O.P. and the “Rule of Threes” will help you to deal with any physical or mental hardships that you might encounter.

Sources:


Province of British Columbia, Wilderness Survival, [Information Division, Ministry of Forests, Victoria, B. C., March 1978] p 8 - 11

Dwight R. Schuh, Modern Survival, Outdoor Gear and Savvy to Bring You Back Alive, [David McKay and Company, New York, NY, 1979] p. 46-51


Thursday, November 29, 2018

Estimating The Time Till Sunset ©


From Bushcraft, Scouting & Woodlore: Notes, Vol. I, Figure 351

For the first installment of the Oelslager Files, I decided to discuss how to estimate how many minutes of day light you have remaining until the sun goes down behind the local or apparent horizon.  This is a well-known tip and I have used this wrinkle often over the years.  It is a good tip to know; not only because the time of sunset varies throughout the year, but also because the amount of daylight you have remaining, depends mostly on the terrain that you are in, wooded, hilly or flat.

The science behind this wrinkle is; the Sun stays still and does not move across the sky, the Earth rotates, and the Sun only appears to move or set. Since, the Earth rotates through 360° in every 24-hour period; this apparent movement equals 15° per hour.  Additionally, your hands and fingers are remarkably accurate measuring tools, and when you hold your hand at arm’s length, your four fingers together measure about 6o or about 60 minutes of time and therefore each finger equals about 15 minutes. 

 
From Brian Ventrudo, “Measuring The Sky”

Dr. R. W. Oeslager wrote that you should hold your hands at arm’s length and count how many fingers fit between the bottom of the sun and the edge of the local horizon, be it a hill, ridge, or edge of a forest.  He also wrote that you should allow 10 minutes of daylight remaining for each finger; other experts calculate approximately 15 minutes per finger.  I believe that the reason for Dr. Oelslager’s estimate of 10 minutes per finger, was that he was primarily writing for Boy Scouts, who would have had smaller fingers than an adult would.  Since each person's finger-size varies, to make sure that this tip produces accurate results for you, experiment at home with a watch, to see if you have 10- or 15-minute fingers.  My fingers give a very good estimate of time, at 15 minutes per finger.

This technique will give you a good estimate of the time remaining until local sunset, particularly if you are near the equator.  However, nearer the poles, you might have more time before sun goes down, below the local horizon, than you would estimate if you were closer to the equator. 

In any case, you should always set up or start back to camp, or if you are misplaced, start building a shelter and a fire, before what woodsman call the “big dark”, when there are eight fingers or about two hours of daylight remaining.  This is similar to Emerson Hough’s First Strict Camp Rule for hunters who were out during the late fall or winter, which states, “…start home at half past two or three in the afternoon.”  By returning to or building you camp, while you still have two hours of daylight remaining, you will reduce your chance of having an accidental overnight adventure or injuring yourself as you make an overnight trek through the wilderness.

Sources:

“Calculating Sunset Time With Your Fingers”, http://awesci.com/calculating-sunset-time-with-your-fingers/, (accessed 11/27/18)

Loring Chien, “How fast does the sun move across the sky?”, January 15, 2018, https://www.quora.com/How-fast-does-the-sun-move-across-the-sky, (accessed 11/27/18)


Dr. Robert. W. Oelslager, Bushcraft, Scouting & Woodlore: Notes, Vol. I, Privately Published

Susan Newquist, “Let Your Fingers Tell Time”, July 31, 2000, https://www.backpacker.com/skills/let-your-fingers-tell-time, (accessed 11/27/18)

Brian Ventrudo, “Measuring The Sky”, April 19, 2009, https://oneminuteastronomer.com/860/measuring-sky/, (accessed 11/27/18)